SUMMERLANDS CHUFFERS


Accucraft WD Baldwin and 4-4-0
Dave Mees has come up trumps again on the Accucraft W D Baldwin (well he is one of the official Service Agents).
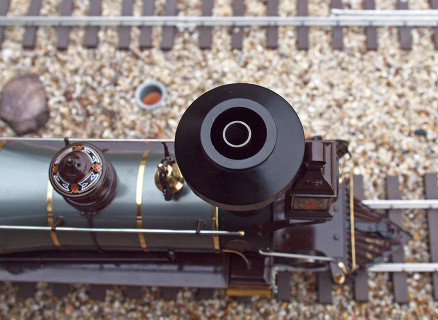
He has fitted a standard Accucraft Chuffer (as per Edrig etc.) and reports that it works very well. You can see a clip here. Dave reports that the smoke-box is not removeable as it forms part of the boiler barrel - but the chimney is fine at the minimum internal diameter of 9.5mm. Dave has supplied the following fitting notes:
1) Remove tanks -2 x M1.6 and 3 x M2 bolts.
2) Remove smokebox ring - 2 x M1.6 bolts.
3) Remove chimney with needle nose pliers.
4) Remove existing exhaust - ditto the pliers.
5) Fit standard Accucraft Chuffer after
feeding chimney nut and washer onto
Chuffer inside the smoke-box.
6) Bend chuffer to clear chimney.
7) Reverse steps 1 to 3.
Roy Wood and I have now fitted Chuffer to his WD Baldwin so here are a few additional notes.
1) We didn't have a nut spinner for the tiny M1.6 bolts, so we made one out of a piece of 1/8" K&S tube by just squeezing the end. It needed re-squeezing every now and then but worked OK. The one tight bolt was started with small pliers.
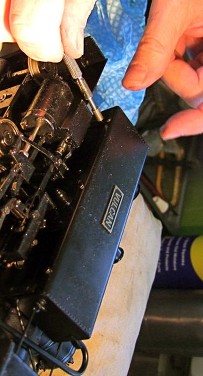
2) There are five bolts to each tank. Two holding straps to the boiler cladding and three underneath each. The pipes all pill out from the front of the cab - all except the big one which unplugs from the top of the tank (we found this out after!).
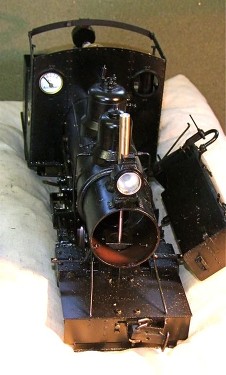
3) There are two bolts holding the front smoke-box ring - at 9 o'clock and 3 o'clock, but we found it was also held by the front two lamp bolts catching on the heat shield plate inside. Remove these bolts and ease it out.
4) The chimney is easy to remove - we used normal long nosed pliers and then fingers.
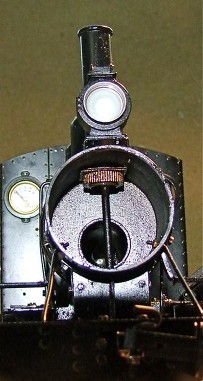
5) The old exhaust unscrews easily, but the hole is very difficult to find - it is there - honest!
6) Once screwed in, it is easy to bend the chuffer pipe to ensure it has the slot free to sound.
7) We found it difficult to re-fit the smoke-box front bolts. Leave the first loose to get the second one in. We started both with pliers and then used our home-made spinner.
8) Do the whole job on a tray - it is very easy to drop these bolts!!!!
9) The whole job sounds more difficult than it is - it took us less than an hour and that included tripping over each other and searching for dropped bolts!
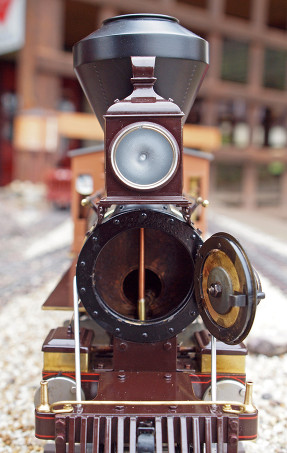
Accucraft 4-4-0
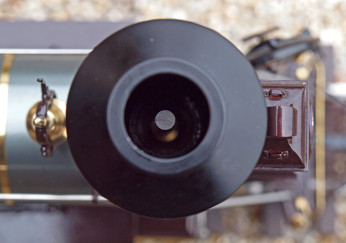
Larry Green in the US has fitted a Chuffer to his Accucraft 4-4-0 which is supplied with two different types of stack. The diamond stack (on Col. Boone) should work fine as the chuffer is inside the tube at the base of the stack. The full balloon stack (the Rushton?) requires a tube to be fitted inside to give the resonance.
Here are Larry's notes from MyLargeScale.com and Llyn Rice's photos:
"With the temp here at 39 degrees and no sun, I steamed the 4-4-0 outside with a load today. The first run was disappointing, with some increase in volume, but no sharp beat like with my 2-6-2. The 4-4-0 has a hollow tapered stack (Rushton?), so I figured the sound was being lost as exhaust swirled around inside before exiting.
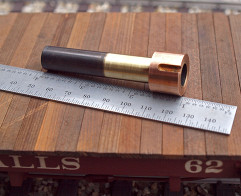
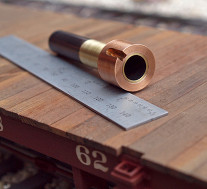
After taking measurements of the inside base of the stack, a 2 7/8" long piece of 1/2" OD X 7/16" ID brass tubing, pressed into a .785 dia. bushing with a milled notch to clear a stack assembly screw, was dropped in place. With another test run,that modifiction produced the nice exhaust beat and volume from the Chuffer.
When checking another similar stack from Accucraft, I found the internal design at the base to be quite different from the one installed on my engine, so the sleeve design will have to be determined for each engine.
I'm very satisfied with both installations of the Chuffer on my engines."
Larry added the following comments in a second post:
"I would expect the inside dimensions at the base of all of these to be different, as found with the two I have. The tubing I used was in my collection of materials, but a suitable tube should be available from K&S Metals at a hobby supplier.
One possible "universal" bushing for the base could be to pour JB Weld high-temp epoxy around the outside of the tube bottom, but this is semi-permanent and might turn off some owners. I can think of some other solutions easier than what I did, but the dimensions for each stack design must be determined first before deciding."